Homemade Yoghurt

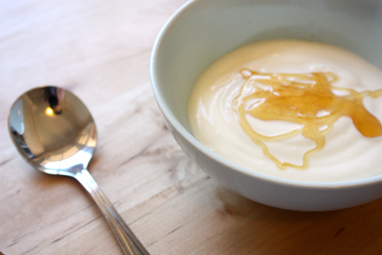
There is nothing better than fresh homemade yoghurt, served alongside stuffed capsicums and musaka, or drizzled with honey for quick summery breakfast.
Homemade yoghurt is a village tradition and although it requires a little patience, it’s super easy, healthy and well worth it.
Mum has been making yoghurt for years, but somehow dad has taken over and become the expert. This recipe is based on one I received via email last week (thanks Mara!) with some of dad’s tips.
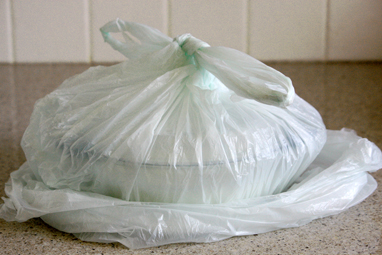
Place yoghurt in 2 plastic shopping bags

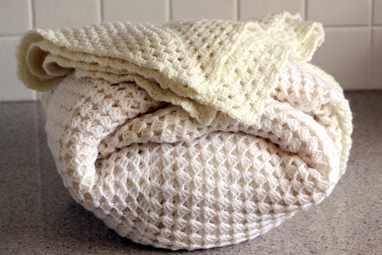
Wrap snugly and don’t move for 6-12 hours

……………………………………………………………………………………
Recipe……………………………………………
Makes 1 litre
Ingredients
1 litre full cream organic milk
2-3 tablespoons plain ‘live’ yogurt (use a natural yogurt containing acidophilus bifidus or similar – this is the starter yogurt)
You’ll also need:
Medium saucepan
Medium ceramic or glass dish with lid
Medium jug and whisk
2 plastic shopping bags
Small blanket or 2 bath towels
Method
1) In a medium saucepan bring milk to a gentle boil (stir every so often to avoid the bottom from burning). Allow the milk to froth up and remove from heat, taking care that the milk does not overflow.
2) In a warm, out-of-the-way spot lay the blanket or towels (lay in a cross formation) and 2 plastic shopping bags with the ceramic dish in the centre. Pour the milk into the ceramic dish and allow to cool (10-15 minutes) until the temperature reaches 43°C. If you don’t have a thermometer use the ‘little finger test’ – when the milk is just cool enough for you to comfortably hold your finger in for 10 seconds.
3) In a medium jug mix the plain yogurt and about a cup of the cooled milk. Whisk until smooth then poor back into the dish. Stir gently and cover with the lid. Tie each shopping bag and snugly wrap with a blanket/towels. (If using a blanket, wrap like a parcel – bottom end over first, then side over side, and the top end over last. If using towels – flap the top end over first, then bottom end, then side over side.)
DO NOT MOVE THE DISH ONCE IT’S BEEN WRAPPED as the milk will not set and coagulate. Leave overnight, or 6-12 hours.
Note: The longer you leave it the tartier it gets.
5) Unwrap and refrigerate. Once in the fridge, the yogurt will continue to thicken and set.
Tips:
– Be sure to save 2-3 tablespoons of your homemade yoghurt to use as the ‘starter yoghurt’ for your next batch.
– If the yoghurt doesn’t work out you can always turn it into cheese. Just bring to the boil with a tablespoon of vinegar and simmer for 2 minutes. Add a little salt, strain overnight and you’ll have homemade cottage cheese.


 are preserved and enjoyed
Kasey
Thanks so much for this post! I eat yogurt every morning, and have thought about making it myself, but now you’ve really inspired me.
VillageCook
Fantastic!!! Once you get the hang of it you’ll love it! Yogurt is really easy and so much cheaper than the bought stuff.
Suzanna xx
Vladimir
This is exactly the recipe that i was looking for. My childhood memories of my grandmother from Macedonia making the yoghurt by wrapping the dish in a blanket are edged in my mind and i am grateful you have published the same method.
Village Feast
Thanks for stopping by V, hopefully you enjoy some of my other recipes too…
Kristine
Ok, I’m going to make this :) But I was curious – what is the purpose of the plastic bags? Do they have insulating properties? And do you have a thermometer or did you use the pinky test?
Village Feast
Yup, the old fashioned pinky test ;)
The plastic bag helps keep the heat in, I’ve read some use an esky for this too. Sxx
Emma
Probably a silly question but does this turn out the consistency of regular eating yoghurt or is it more like the breakfast drink?
VillageCook
Hi Emma, the consistency isn’t quite as thick as store bought yoghurt, however, it is too thick for drinking.